Back to TheWorxHub for Senior Living Main Menu
Adding and Managing Biomed Fixed Assets
The Biomed application for TheWorxHub is an asset-based tool that streamlines the management of your biomedical equipment to ensure necessary maintenance is performed, equipment is accounted for, and devices are safe for use in patient care. *Note: If you do not currently have this application, please contact your Sales Representative or Client Services for more information.
How to Add a New Biomed Fixed Asset
- Click the Add button at the top right corner of the screen and select Fixed Asset from the drop-down menu.
- Select Biomed from the Application drop-down menu.
- Use the Location Picker (
 ) to choose a location for the new asset.
- If you have access to the Space Management application, click the map pin icon (
 ) to select a location from a floor plan drawing. *Note: If you do not currently have this application, please contact your Sales Representative or Client Services for more information.
- If you have access to the Space Management application, click the map pin icon (
-
Add a brief Asset Name/Description.
-
Choose a Category and Subcategory for the asset from the drop-down menus.
- You can enter a Barcode # manually or click the Generate Barcode link to automatically create a new barcode number.

-
Select an Account/Budget Code, if applicable.
-
Select the Environment of Care Category, if applicable.
-
If the asset’s replacement cost will be tracked using Capital Planning, enter the Purch date, Purch cost, and Mfg. Est. Lifespan. *Note: If you do not currently have the Capital Planning application, please contact your Sales Representative or Client Services for more information.
-
The New Fixed Asset form includes additional fields to assist with your equipment control procedures.
- Manual Time Change: Use this option when the asset requires a manual adjustment to account for Daylight Saving Time.
- Contains PHI: Use this option when the asset contains Protected Health Information (PHI) to ensure the device is accounted for and disposed of properly. *Note: PHI is not stored in the asset file within TheWorxHub.
- Has Clinical Alarms: Use this option when the asset has an alarm that alerts the clinician that immediate action is needed. This option can be used for tracking devices such as infusion pumps and ventilators.
- Enter any additional detail about the asset in the available fields on the New Fixed Asset form.
- Click Save.
- Once you click Save, additional panels will appear on the Asset Info page. Expand the Asset panels by clicking on the panel title and enter any information needed.
Adding Biomed Network Information
Network Info Panel
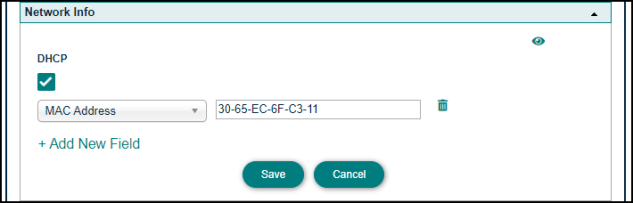
The majority of biomedical equipment is online and connected to a network. The Network Info panel allows you to track the technical specifications of your biomedical assets.
- Click and expand the Network Info panel on the asset form.
- Check the DHCP box if your medical device is managed by a DHCP server.
- Click the +Add New Field link.
- Select the appropriate specifications from the Select Type drop-down menu and enter the information for your device. *Note: The information entered for your device will vary depending on your organization's network configuration. Please contact your IT department if you need assistance obtaining these details.
- Click Save.
- To delete a specification from the list, click the trash can icon (
 ).
).
- Due to the sensitive nature of this technical data, all viewers of the Network Info panel are tracked.
- Click the view icon (
 ) to open the Network Panel Viewers Log. The log will include the user who viewed the panel, as well as the date and time the panel was viewed.
Adding a Battery
The Batteries panel allows you to manage the batteries in your medical devices.
- Click and expand the Batteries panel on the asset form.
- Click the Add Battery button.
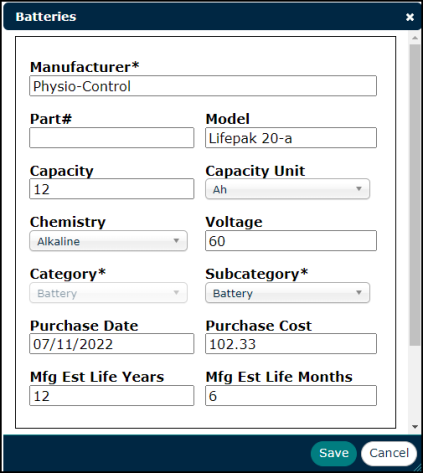
- In the window that appears, enter the Manufacturer of the battery.
- Enter the Capacity and select the Capacity Unit from the pick list, if applicable.
- Select the Chemistry from the pick list, if applicable.
- Select a Category and Subcategory for the battery from the drop-down menu.
- Enter as much additional information as possible about the battery in the available fields.
- If the battery's replacement cost will be tracked using Capital Planning, enter the Purchase Date, Purchase Cost, Mfg Est Life Years, and Mfg Est Life Months. *Note: If you do not currently have the Capital Planning application, please contact your Sales Representative or Client Services for more information.
When entering the Purchase Date for a replacement battery, it is recommended that you use the date the new battery will be installed in the device.
- Click Save.